The SAP GUI front screen can be customised to add your own image if needed – here is how.
The front screen with no image looks like below:
![](https://blogger.googleusercontent.com/img/b/R29vZ2xl/AVvXsEiswuNDyzlGucOrAF0WiT2GRHNMDc8SWbvNpVcUWbS1jcrKsMQu5TzSojaywIVe896nt9imWcWk9yDLCXKwzU-4EhYh8t5iZurPsZGvIO7EMnfDAzLO7W__Cr36D1AePutWdXdw_mNOo_Xnq9_nCeYh0TWHqXNscWgmZU-k2-wP2FeoU4S-2yWlYVAzPw/w640-h346/Screenshot%202022-06-09%20151535.png)
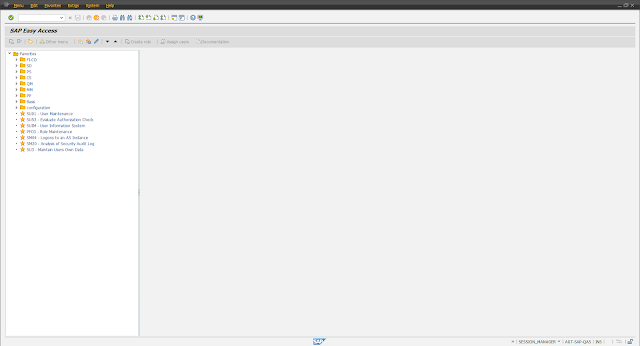
Pretty boring, right?
As it is the season of goodwill, let’s show you how to add something a little more festive. These steps should be carried out by your system administrator.
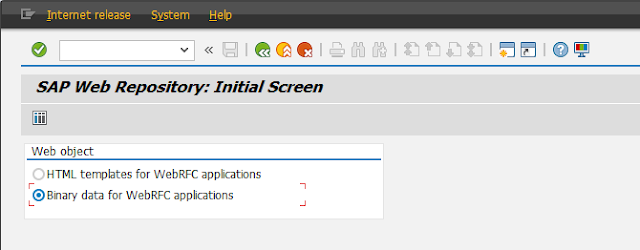
1. Open transaction SMW0 and select “Binary data for WebRFC applications” and hit enter.
![](https://blogger.googleusercontent.com/img/b/R29vZ2xl/AVvXsEhb3g4kcpme_8ltu1Of4l9Il1WQ8_dXUZkVeWRI0tAULf_f2R3e9vh8RWcGyLlHzQcT-EsaAQtjsHldDgxIFd05SIwbGECxgYQyJKCLvRYJlxl0nazslbGOYFkclntM_FYdPz50kdkdGXrvebMJcASIvLwHPzQl2LhSuGB-9dB-xLmJxbTWF6iy0fbMaQ/w640-h250/Screenshot%202022-06-09%20151720.png)
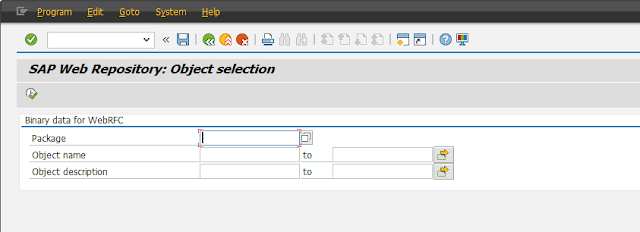
2. At the SAP Web Repository screen, simply hit execute.
![](https://blogger.googleusercontent.com/img/b/R29vZ2xl/AVvXsEh1GR2UZjHisjizXClmssoOXSolbbw4QbCKbGPPwfNGBtH9iB6kO0nZh3pWST5rkBaH5b9jy5N39h72aoMzF7-HHOQyUrdk9hqtqjrC1ok7r1xN1frnMr0cwIlBuX28aonZ9HNGSsisMg-7FEYlZMZ5g2p0g5ecXK337LRWvPEgjdNL0v33punURX0tYQ/w640-h232/Screenshot%202022-06-09%20151720.png)
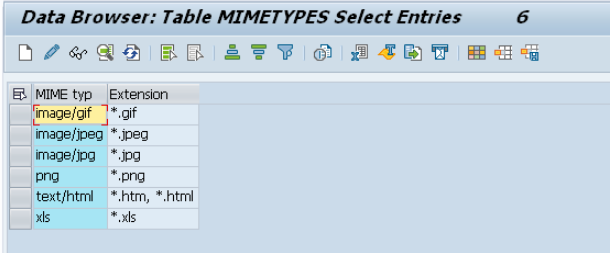
3. Go to Settings>Define MIME Types.
![](https://blogger.googleusercontent.com/img/b/R29vZ2xl/AVvXsEh24ZEZkeLVEB0UbIrQ9kcCvSRz21slJdB4gEHewuxdM2jwQqgrNGAuZePUPn2KJZWePlHotVn651bwHxp9AAvP0xPa28aIChWkuaibUDLIAMYem25Q4XzP3a7CzsPpLE1zs1PcS_klrXfsdLoPAfc6J2LN2MaQ-HX-MR-5XRZiXXtIQrV2OWbA2ie6lg/w640-h262/Screenshot%202022-06-09%20152325.png)
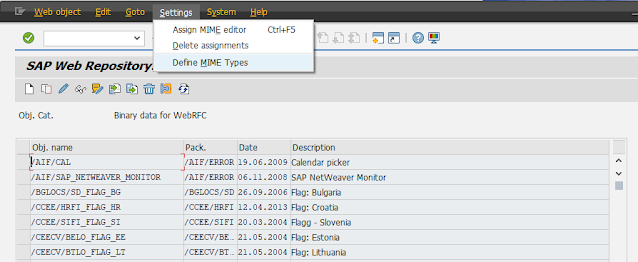
4. If the extension does not exist for the picture you want to upload, add it here using the Create icon and save.
![](https://blogger.googleusercontent.com/img/b/R29vZ2xl/AVvXsEinx4hDGaPj4qsNc1MejPctPOFBKhUaIV1jkAbBXHo9ae-2DL1VQmPV-QSWj3wl-OGqgudMqee8F_qb-xMkJ9iE9Tal1-Tdv3Fc2lecGa_RciFsUmcq4ejOiOsUCHXBJJPCChvOdgsxvVq7aWq8UInaT-iwThDV5eL4hLMk1CvIkah2YuD-uRe8gka7hw/w640-h264/Screenshot%202022-06-09%20154553.png)
5. Hit back to get back to the web repository, then hit the Create icon and add your object name (starting “Z”) and description.
![](https://blogger.googleusercontent.com/img/b/R29vZ2xl/AVvXsEhrnZqx35MGbd83PKaJ0OocqeaFuXxo9ASqnIbnDcjtuOyVttQNe86GZwB6yqKcx1WM49lC5MhPcf8_3r96f5cLnPcNU9YOewAuXoDH-cttGbTHaxI_X9sx9--cU441vjYSsN8X2hMjyeKus-l2ufu_EGiKDFjlsOowIfqHgC1fMtMkanCApl1AbBWRLw/w640-h258/Screenshot%202022-06-09%20154646.png)
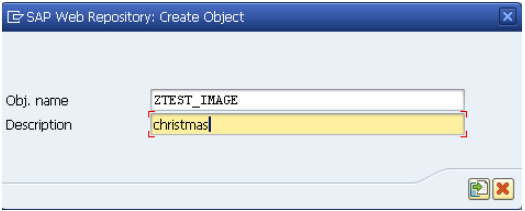
6. Click the Import button from the create popup and select the image from your computer.
7. A transport request popup is created – click “Local Object.”
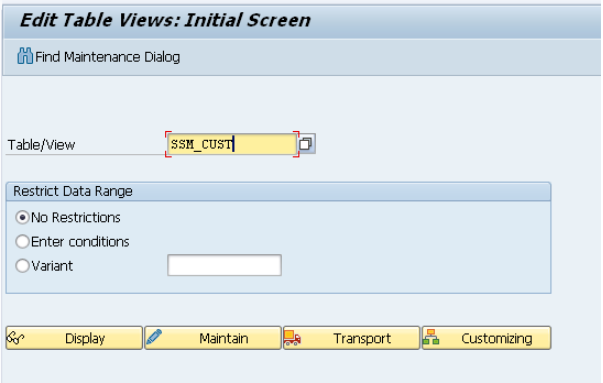
8. Your file is now saved to the system. Now go to transaction SM30 and enter table SSM_CUST and click Maintain.
![](https://blogger.googleusercontent.com/img/b/R29vZ2xl/AVvXsEiGXDjl_Y2APPDJTP-mbRd9ppFT2T-Z4LUnyguHOwAR0aOI86-mDsojBmhkWiO5s9P6yxYwHSzkarR1tQbpDbHqBunv3Llk8cwdEjx9j4xCV8CIFlkWPUTY0hqqhH4b_-Q5QYCoKcISiIbipmX_rbJww8A8ApanXFLxgzG50PGVeCjEA95WPRV7bxGJfw/w640-h406/Screenshot%202022-06-09%20154816.png)
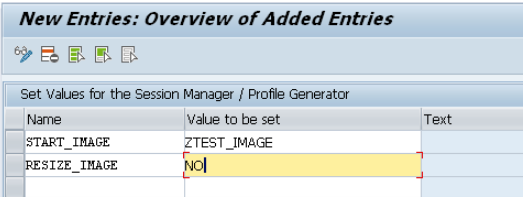
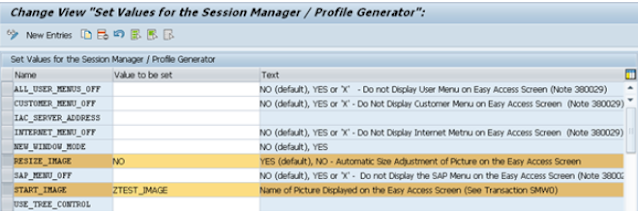
9. Click on “New Entries” and add the below entries, with your file name for your image as created earlier.
![](https://blogger.googleusercontent.com/img/b/R29vZ2xl/AVvXsEgGSoMkwNdme5QlulAidRw9YZHS75b98VDlDnXUgj6VlRzkwvhEkcw3xcTCzSDYJoU1Dy2xtPbLALfaQ3XvaFy1E9krOpu7X-qScXxWIaZiyAtuKlm_NjeEICg3kJ4SZxXnOvioXe_2EGfmwulKqfY1WU-OnQIX2OS2FO6rItKT74inQYsUU7-lr_4xKQ/w640-h244/Screenshot%202022-06-09%20154931.png)
10. Once saved and assigned to a transport, your table now looks like this.
![](https://blogger.googleusercontent.com/img/b/R29vZ2xl/AVvXsEgkg_-GnwUBbeOPv0_9Zo7yMY19bCHXiPowPD9DMnlNEsJKDHZNLsay2DWS1xid_-Xo_ZD4UM4jvbAw6llzf1e75lpiLh9LWrZvkk1nvC4WqlYnT27fGpV4VmN80Ud16_gDfudhnHbR2qoZ4idvb182JfG1tKls4QpebY7VrjpTJSlQJzy8X8DqpEobQA/w640-h212/Screenshot%202022-06-09%20155057.png)
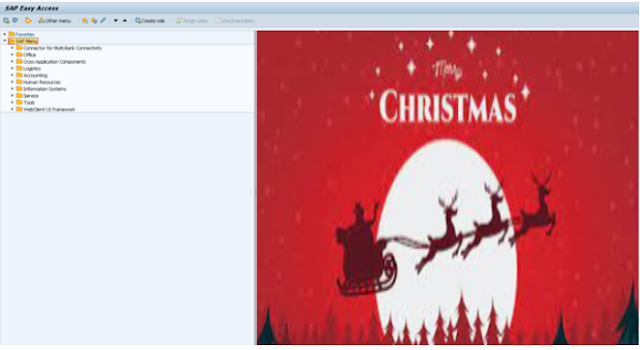
11. Start your homepage using “/n” in the transaction bar to see your new image:
![](https://blogger.googleusercontent.com/img/b/R29vZ2xl/AVvXsEiKkzQsdj2mNIRxwlSSXdwwLL9D36ougIysDJsmklQLFtd_sHYC7RnF_4sqai7EFBsVytDqDXIpKwHOUIvra5v7qty3UVycq4580I1ZMsTC9BA-x_e9Rqs5cihClvHrmlxvYc_G9o372BVmOAxidAuTdmbkze6B115fowcWGl_8YZgh_vDv-PG9Ba5bqg/w640-h350/Screenshot%202022-06-09%20155111.png)
I hope you find this useful! Stay tuned for another SAP Tip in next.
Comments
Post a Comment